
What Is QuickBooks Database Server Manager And How To Use It?
Are you preparing to use QuickBooks in a multi-user mode? If yes, you are at the right place to initiate your journey forward. This guide will discuss the primary utility tab, QuickBooks Database Server Manager, that you must install for the multi-user format. As a general layout, you can expect the following details from this guide:
- Basic definition.
- Relevant facts.
- Download process.
- Configuration procedure.
- Set up modes.
- And mechanism for the update.
Hence, it will help if you stay in tune with the guide. The details in the guide could enhance your understanding of this tool’s features. Further, you can connect with us to improve your business performance. Our customer support facilities are available via the helpline support number @1-888-858-6199 and live chat services.
What Is QuickBooks Database Server Manager?
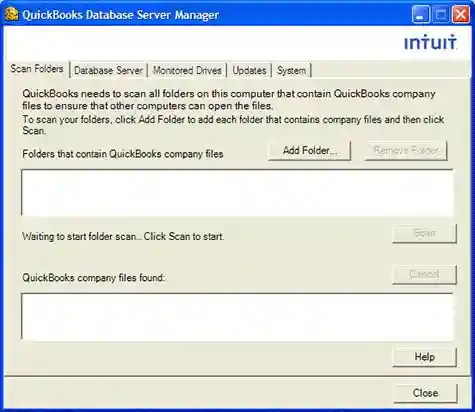
Hence, the tool converts your framework into a centralized process organizer. Nevertheless, the framework benefits you in many ways, but its absence will restrict software performance. Therefore, you must cautiously deploy and work with this software for your business growth.
Facts To Know About The QuickBooks Database Server Manager
As a QB user, you must know the following facts about the QB Database Server Manager:
- First, it works on network data (.ND) files which is the soul on which the tool relies.
- Second, QBDBMS is a mandatory facility you must seek to work on different versions of QB Desktop.
- Third, QB Database Server Manager is compatible with providing multiple versions of processes, not the software.
- Fourth, during the installation of QBDSM, you have to take care of existing users available in the company list.
- Fifth, separate versions of QBDSM are necessary for different versions of QuickBooks Desktop.
How To Download QuickBooks Database Server Manager?
The process of downloading QuickBooks Database Server Manager is not tricky as it looks. Here, the only condition is that you must be aware of the actual procedure. Besides, you should know the system requirements before you delve into the process. Further, the process involves the following steps:
- First, open the official site of Intuit to access further stages.
- Afterward, search for the QuickBooks tool hub option.
- Then, click on the tool hub’s extension file to initiate the download process.
- After this, move to the download section where you saved those files.
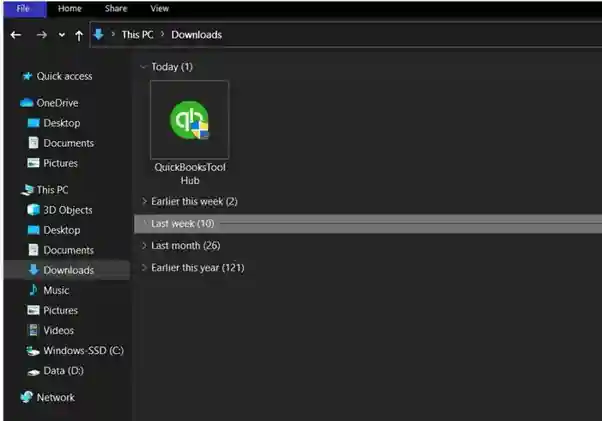
- Further, double-click on the downloaded file to open it.
- Followed by this, tap the “Yes” key to allow the app to change your system settings.
- Here, a licensing wizard will appear on your screen.
- Subsequently, read through the licensing terms and accept them.
- Meanwhile, you entered the installation window of the process.
- From here onwards, proceed with the on-screen prompts and hit the “Next” key.
Later on, hit the “Finish” option to conclude the installation process.
- At this point, open the QuickBooks tool hub by double-clicking on the app icon.
- Moreover, go to the “Network Issues” tab.
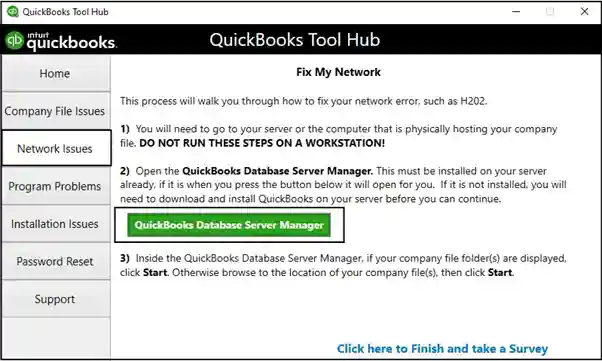
- Consequently, click on the “QuickBooks Database Server Manager” option.
- Followed by this, go with the on-screen instructions.
- Finally, grant necessary permissions and let the tool handle all your server-related queries.
How To Configure QuickBooks Database Server Manager?
- First, open Windows’ “Start” menu.
- Afterward, write “Services” into the search tab.
- Then, hit the “Open Services” option.
- Now, open the server manager menu from the QBDBMS option.
- Subsequently, move to the “General” tab and check for the service status section.
- After this, navigate to the “Automatic” option from the drop-down menu.
- Further, go to the “Log on” tab and select the “Local system account” option.
- At this point, move to the “Recovery” tab.
- Lastly, click the “Restarting the service” option.
Note: If the server regularly shows errors, you can restart the process to fix the issue.
How To Set Up QuickBooks Database Server Manager?
After installing the QBDBMS, it is time to perform the setup process.
- First, configure the firewall setup manually to allow the tool to run on the server system.
- Afterward, open the QB Database Server Manager.
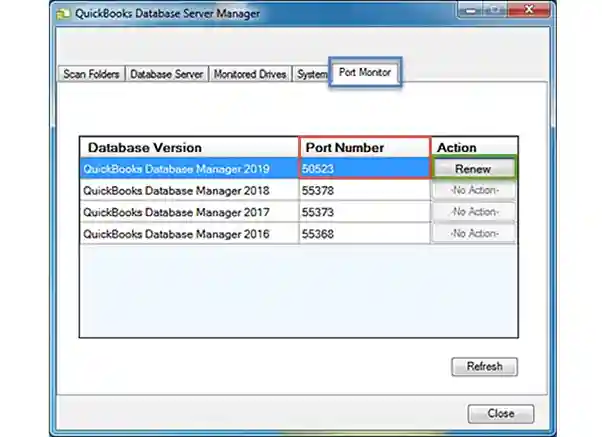
- Then, click on the “Port Monitor” tab and submit the port number to proceed further.
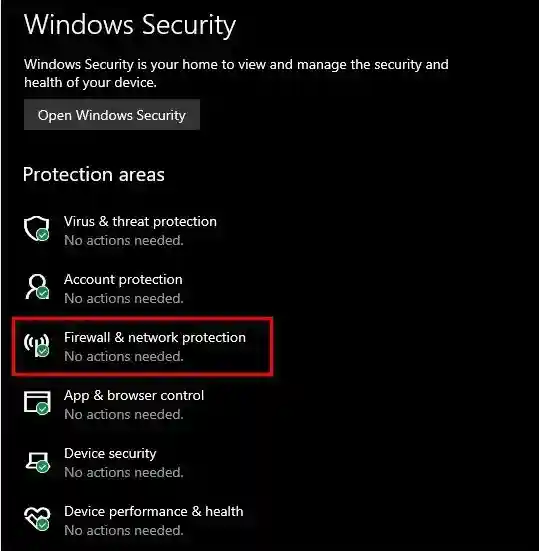
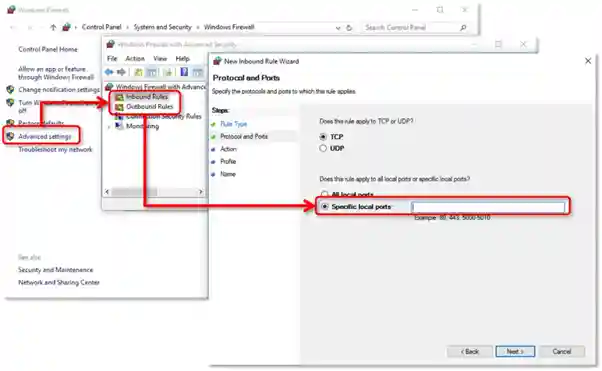
- Subsequently, click the “Start” menu and navigate to the Windows Firewall menu.
- Followed by this, open the “Advanced Settings” tab.
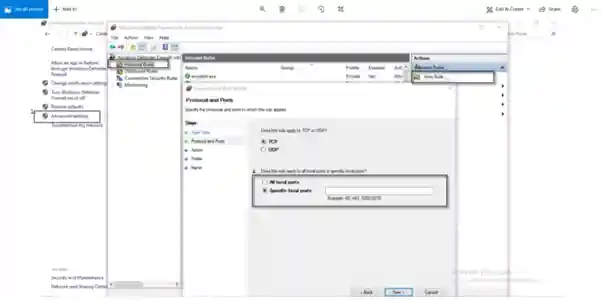
- Moreover, click the “Inbound Rules” section and then the “Rules” section.
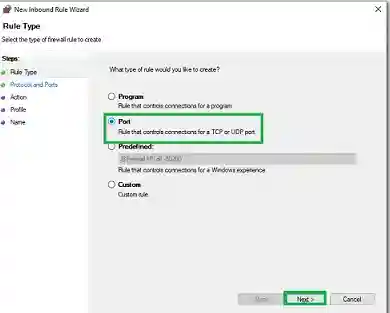
- Further, click on the “Port” section and, subsequently, the “Next” option.
- At this point, select the “TCP” option.
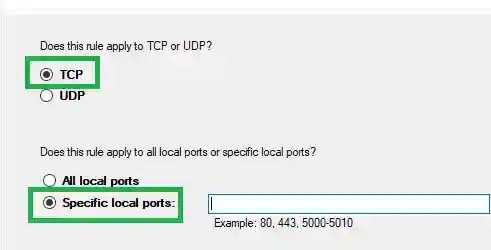
- Now, select specific ports from the available dashboard.
- For QuickBooks Desktop 2020: 8019, XXXX.
- For QuickBooks Desktop 2019: 8019, XXXX.
- QuickBooks Desktop 2018 port format is 8019, 56728, and 55378-55382.
- For QB Desktop 2017: 8019, 56727, 55373- 55377.
- For QuickBooks Desktop 2020: 8019, XXXX.
- For QuickBooks Desktop 2019: 8019, XXXX.
- QuickBooks Desktop 2018 port format is 8019, 56728, and 55378-55382.
- For QB Desktop 2017: 8019, 56727, 55373- 55377.
- For QuickBooks Desktop 2020: 8019, XXXX.
- For QuickBooks Desktop 2019: 8019, XXXX.
- QuickBooks Desktop 2018 port format is 8019, 56728, and 55378-55382.
- For QB Desktop 2017: 8019, 56727, 55373- 55377.
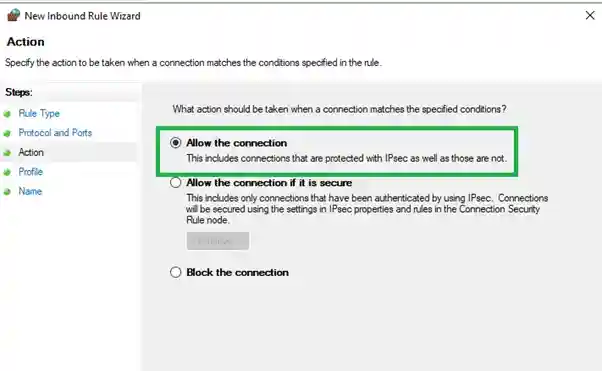
- Now, create a rule and give it a title.
- Lastly, click the “Finish” option to summarize the process.
How To Update QuickBooks Database Server Manager?
- In general, QB Database Server Manager upgrades simultaneously with QuickBooks Desktop. Meanwhile, you can also update QBDSM manually by proceeding with the following steps:
- First, open Intuit’s official website from the Chrome browser.
- Afterward, locate the updated patch and simultaneously download it.
- Now, follow the installation manual and wait for the process.
- Followed by this, reboot the server.
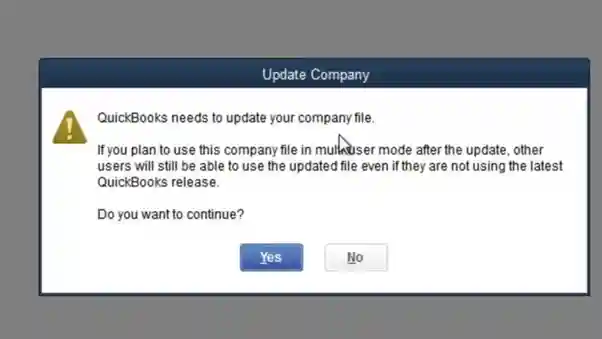
- The message “The company file wants an update to work in consonance with this version of QB Desktop” will appear on your screen now.
- Then, the next step involves the creation of a local backup of your company data.
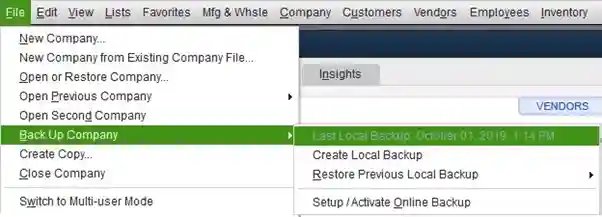
- Further, you must proceed with the on-screen prompts to conclude the procedure.
Wrapping It Up
The QBDBMS is a widely acclaimed tool because of its multi-user characteristics. The tool finds its significance because there are instances when you may not find helpful resources for your concerns. And we covered everything with the guide. Therefore, save this guide to the QB Database Server Manager for future reference.
Meanwhile, you can also dial the helpline number @1-888-858-6199 to speak to QB ProAdvisors. This way, you can better narrate your ordeal with QB servers and get a solution for your concerns. Further, you can also look after the live chat facility to express your problems better.
Frequently Asked Questions
QuickBooks Database Server Manager is an added facility. It enables the multi-user mode in QuickBooks. Further, it manages the company files on the server and allows you to simultaneously work on the same file.
You cannot access the multi-user mode in QB without QuickBooks Database Server Manager. This tool is a basic requirement for accessing the multi-user mode in QuickBooks. It is because the tool creates network data files that facilitate communication between QB Desktop and users’ computers.
You can update QuickBooks Database Server Manager in the following steps:
- First, open QB Desktop on the server system.
- Afterward, navigate to the “File” menu.
- Then, opt for the “Utilities” tab.
- Now, click on the “Host Multi-User Access” option.
- At this point, you will have to wait for the procedure.
- Lastly, hit the “Finish” key to wind up the process.
Yes, you can use the password reset tab if you forget your QuickBooks account credentials. This tab will guide you through the process of recovering the account password. Moreover, it allows you to create a new one for your login.