
Easy Way to Download QuickBooks Install Diagnostic Tool
QuickBooks is a widely used accounting and bookkeeping software that caters to businesses of all sizes. It is important to have all necessary Microsoft components for QuickBooks Desktop to function properly, as it is crucial for efficient business management. If any of these components are missing, damaged, or not running properly, it can result in a QuickBooks error notification and affect overall business operations. Nonetheless, it is common to experience technical glitches either during the software installation process or while utilizing it. Despite being a reliable tool for over a decade, QuickBooks’ intricate codes and algorithms can cause errors that may impact business operations. It’s crucial to address these errors promptly to ensure smooth business proceedings. Fortunately, there is a solution for installation errors – the QuickBooks Install Diagnostic Tool. Developed by Intuit, this tool is specifically designed to fix installation errors that may occur when installing QuickBooks desktop or opening it thereafter.
What Is QuickBooks Install Diagnostic Tool?
If you’re facing issues while installing QuickBooks Desktop, the QuickBooks Install Diagnostic Tool is here to help you. This tool is specifically designed to troubleshoot installation issues and address problems related to Microsoft core components.
You can use the QuickBooks Install Diagnostic Tool to troubleshoot various installation errors, such as::
- Errors with the QuickBooks installer
- Errors with the QuickBooks database
- Errors with the QuickBooks C++, .NET, and MSXML frameworks
These components play a vital role in the proper functioning of QuickBooks, and the diagnostic tool can automatically detect and resolve errors. With its ability to ensure a smooth installation process, this tool is truly helpful and efficient.
What are the Benefits of Using the QuickBooks Install Diagnostic Tool?
The QuickBooks Install Diagnostic Tool has several benefits that can be useful to you. Some of the primary advantages of the application include:
Increase Efficiency
Detects and resolves installation errors effectively.
Automatic Error Detection
This tool operates automatically, which means less manual work for you. This will save you the time you would otherwise need to spend identifying the problem.
Reduce Human Intervention
This tool is less prone to human-originated errors. That’s because human intervention is one of the potential causes of increased process timing.
This tool is highly effective in fixing errors, such as:
QuickBooks Error 1402, 1603
MS .NET Framework errors
MSXML damage errors
QuickBooks error 1903, 1904, 1935
ABS PDF driver errors
QuickBooks Error 1334
Damaged C++ related errors
QuickBooks Error 15106
QuickBooks Error 1712, 1722
QuickBooks have stopped working problem while opening QuickBooks
Unrecoverable Desktop Error in QuickBooks
Errors about verifying your subscription
Key Factors to Keep in Mind Before Installing QuickBooks Diagnostic Tool
- Close all other programs on your system before proceeding to run the error-fixing tool on your computer.
- Once the tool has been launched on your system, it will detect and repair any errors that have been detected. Although you may also need to reboot the system.
- If you receive a notification stating that no errors were detected, then it is possible that the issue has not yet been resolved.
- Don’t hesitate to take help from an IT professional or Windows expert if you’re not tech-savvy.
- It is necessary to re-register or reactivate QuickBooks Desktop after the tool has been executed.
Easy Download and Installation Framework for QuickBooks Install Diagnostic Tool
Simply follow these steps to install and use the QuickBooks Install Diagnostic Tool:
- Firstly, go to Intuit official website.
- Next, search for the QuickBooks Diagnostic Tool file and download it.
- After the prompt appears, you will need to save the QuickBooks installation tool file to your desktop.
- Please make sure to close all open programs on your PC before continuing.
- Next, locate the QBinstall_tool_v2.exe file in the folder.
- To start the installation wizard, simply double-click on the QBinstall_tool_v2.exe file.
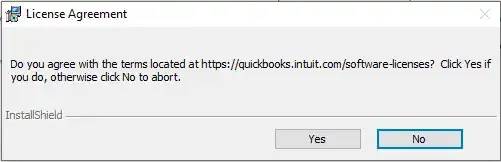
- Now click on the “Yes” tab to accept the license agreement.
- Furthermore, click on the “Proceed” tab to start the scanning process.
- Now, restart your system after completing the scan and open the tool.
- To activate your account, re-register with your QuickBooks ID.
- Moreover, ensure that your Windows operating system is updated.
- Finally, restart your system and save all necessary changes.
How to Fix Installation Errors Using the QBInstall Diagnostic Tool
If you have encountered any installation errors while installing QuickBooks, worry not! The QuickBooks Install Diagnostic Tool can be your saviour. This powerful tool can detect and troubleshoot multiple errors, ensuring a smooth and error-free installation of QuickBooks. So, if you want to avoid any installation hiccups, make sure to use this tool.
Here are the steps you can follow to troubleshoot common installation errors when using QuickBooks:
Step 1: Download the QuickBooks Tool Hub Program
This tool helps to mitigate all the common installation errors you may encounter.
- To begin, it is necessary to close QuickBooks desktop.
- To download the QuickBooks Tool Hub file, go to the Intuit website.
- It’s advisable to save this file on your computer in a location that’s easily accessible.
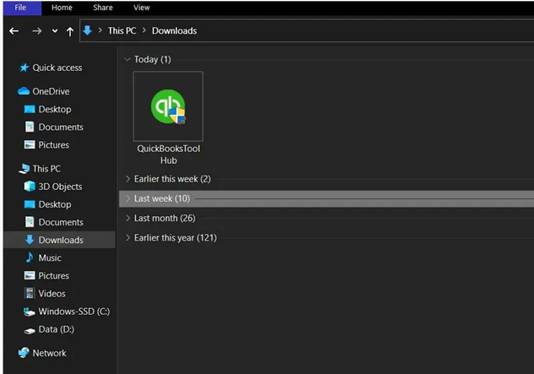
- After the file has been successfully downloaded, please open it.
Note: File extension name: QuickBooksToolHub.exe
- To install it, simply follow the instructions displayed on your screen.
- Now, click on Next and accept the terms and conditions.
- After the installation of QuickBooks Tool Hub is complete, simply double-click on the icon to open the tool hub.

Step 2: Install the QuickBooks Tool Hub on Your System
To proceed, please carefully follow the instructions displayed on your screen for installing the tool setup on your device.
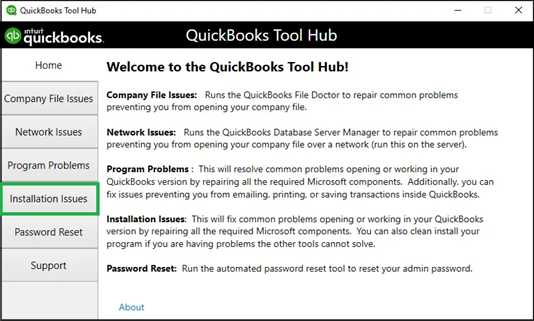
- To open the QuickBooks Tool Hub program, you can either click on its desktop icon or search for it using the Windows search function.
- In the QuickBooks tool hub, select Installation Issues.
- Once you select Installation Issues tab, you get a screen where you select QuickBooks Install Diagnostic Tool option.
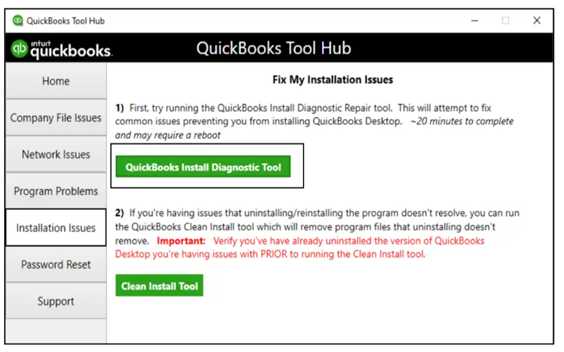
- After you click on QBInstall tool, it will start automatically.
- Wait for 20 minutes or more and let the tool run on your system.
- In the end, Once the process finishes, restart your system..
Step 3: Updated Operating System
An outdated OS can impact the speed and performance of your system. Therefore, you must update your system before installing this tool.
After the system update, simply follow these steps
- First, simply restart your system.
- Next, you need to ensure that QuickBooks starts without errors.
- Now, if it opens properly, open your company file and start working.
- Otherwise, if the QB installation fails, you will need to reinstall QuickBooks Desktop.
Step 4: Repairing Windows Components Manually
- To fix the issue, repair or reinstall MS .NET Framework. Access the process via the control panel > “Programs and Features” for Windows 10, 8.1, or 8 users.
- For 64-bit systems, use “Run as Administrator” during installation.
Step 5: Installing QuickBooks Desktop from Selective Startup Mode
In order to install QuickBooks desktop using this mode, you must follow the steps outlined below:
- To begin with, prepare the data.
- Next, start system processing in Selective Startup Mode.
- Now, install QuickBooks.
- Finally, switch to Normal Startup Mode.
Start your system in selective startup mode following these steps
- Firstly, to open MSConfig in Windows, search for it in the “Programs and Files” field. Alternatively, you can press the Windows + R keys on your keyboard to launch MSConfig.
- Secondly, to access the selective startup and load system services, go to the General tab and click on the corresponding tab.
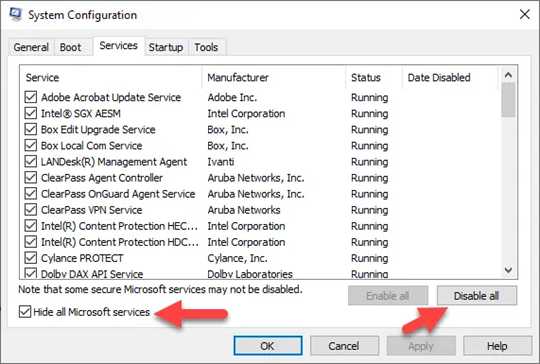
- Next, click on the Services tab and then select the option to Hide all Microsoft services.
- Now, click on the “Disable all” tab.
- Before the end, make sure to uncheck the “Hide all Microsoft services” box and select the “Windows installer” box.
- In the end, click on the OK tab and restart the system configuration window.
Steps To Reinstall QuickBooks In The Selective Startup Mode
- To activate Selective Startup Mode, start by pressing the Ctrl + R keys.
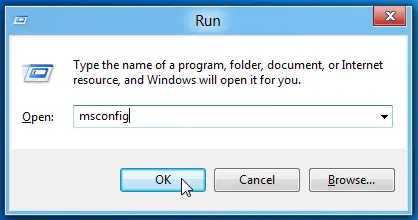
- Next, simply type “msconfig” in the given tab and select OK.
- Now, you need to click the “Selective Startup” tab.
- And now select the “System Services” tab.
- Finally, click the “Startup Items” tab.
- On this screen, click the “Disable All” option to hide all MS services.
- Now, go to the Services tab and ensure the check marked for the “Windows installer” option.
- Next, select the “Ok” key to restart your computer.
- Finally, you can reinstall QuickBooks.
Conclusion
We believe that with the help of the above comprehensive guide, you can easily install the QuickBooks Install Diagnostic Tool. You can effortlessly resolve any installation issues you may be experiencing with QuickBooks Desktop by using this tool.
If you encounter any difficulties while utilizing this tool, please do not hesitate to contact our 24/7 helpline at 1-8447349204. Our team of experts is always prepared to offer you assistance and aid you in finding solutions to any QuickBooks-related inquiries.
Frequently Asked Questions
It is an Intuit-developed software tool. It assists you in diagnosing and troubleshooting installation errors in QuickBooks software. Thus, you must ensure that you integrate this tool into your accounting framework.
- Initially, you should go to the Intuit official website to download and install the QuickBooks Connection Diagnostic Tool.
- After installation, choose the appropriate connection type and provide the necessary network and company file details.
- To troubleshoot connection issues, click on the “Connectivity Test” tab and follow the suggested steps.
QuickBooks’ component repair tool is a software utility designed to address problems associated with MS .NET Framework, Microsoft MSXML, and C++ Redistributable Components. Essentially, this tool ensures the seamless operation of the QuickBooks software.
To utilize the clean install tool in QuickBooks, you must first download and run it from the official QuickBooks website. This tool aids in resolving installation problems by thoroughly removing all QuickBooks files and subsequently reinstalling the software.
To download, please click on the following link: http://dlm2.download.intuit.com/akdlm/SBD/QuickBooks/QBPDF/QuickBooksDesktopInsta llDiagnosticTool.exe. Once the download is complete, save the software setup files to your local desktop when prompted.
A tool is available for QuickBooks desktop users to resolve various issues related to network and company file corruption. This tool efficiently identifies and fixes any connection errors that may arise between QuickBooks, company files, and the database manager.
You can use these solutions to fix QuickBooks installation issues
- Update your Window OS
- Downloading QuickBooks tool hub and use Install Diagnostic Tool
- Manually fixing the Windows components
- Using selective startup mode to install QuickBooks desktop on safe mode
- Closing QBW32.exe process
- Perform a clean installation of QuickBooks